Managing Resource Link Types
Viewing Resource Link Types
The Integration Links window displays all the links between resources discovered on a selected source.
Before you start
You must have Integration Setup selected in the Admin tab of your General Access Security Role.
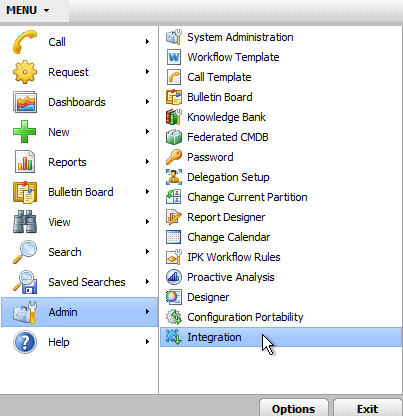
- Select
 and then Admin. From the submenu, select Integration
  . The Integration Platform Settings window is displayed
  . Select Menu and then Admin.
 - From the submenu, select Integration.
- The Integration Platform Settings window is displayed. Select the Links option from the explorer pane
 .
. - In the Integration Links window, select a source at Filter By Source. If no link types are defined, the table will be blank. Otherwise, the table will display the following information about each link type. (You may like to adjust the column widths to see all of the columns.)
- To view the mapping details a link type, double-click the link type in the browse table.


| Link Type | This is the relationship information between external resources. |
| Resource Type A / Resource Type B | Each link type involves a higher resource type (Resource Type A) and a lower resource type (Resource Type B). When a link between two resources is imported, the CMDB Item corresponding to the resource of the higher resource type becomes the first CMDB Item in the link and the lower resource becomes the second CMDB Item. |
| Mapped | If selected, the link type already has link mappings are defined. |
| Not Mapped | If selected, the link type does not yet have any link mappings defined. During a scheduled scan, instances of link types are detected by an import and corresponding item links between the corresponding CMDB Items are created with the information defined by the link mapping details. Link types are displayed only for mapped resources. |
Links are imported only if a scheduled scan is performed. When resources are imported through the External Resource Search window, for example, any links associated with those resources are not imported.
Viewing Resource Link Type Mappings
Before you start
You must have Integration Setup selected in the Admin tab of your General Access Security Role.
- Select and then Admin. From the submenu, select Integration . The Integration Platform Settings window is displayed . Select Menu and then Admin.
- From the submenu, select Integration.
- The Integration Platform Settings window is displayed. Select the Links option from the explorer pane .
- In the Integration Links window, select a source at Filter By Source.
- Pick a resource type, and double-click a link type. The following information is displayed about the selected link type.
| Source | this read only field displays the name of the source selected from the Integration Links window | ||||||
| Link Type | this read only field displays the name of the link type selected from the Integration Links window | ||||||
| Resource Type A | this read only field displays the name of the higher or parent resource type | ||||||
| Resource Type B | this read only field displays the name of the lower or child resource type | ||||||
| Mappings browse table |
this table displays all the link type mappings configured for this link type. The browse table includes columns for
|
Adding a Link Type Mapping
Before you start
You must have Integration Setup selected in the Admin tab of your General Access Security Role.
- Select and then Admin. From the submenu, select Integration . The Integration Platform Settings window is displayed .Select Menu and then Admin.
- From the submenu, select Integration.
- The Integration Platform Settings window is displayed. Select the Links option from the explorer pane .
- In the Integration Links window, select a source at Filter By Source.
- Pick a resource type, and double-click a link type.
- Select
 and specify the details.
 - Select
 to save the changes.
Updating a link type mapping
Before you start
You must have Integration Setup selected in the Admin tab of your General Access Security Role.
- Select and then Admin. From the submenu, select Integration . The Integration Platform Settings window is displayed . Select Menu and then Admin.
- From the submenu, select Integration.
- The Integration Platform Settings window is displayed. Select the Links option from the explorer pane .
- In the Integration Links window, select a source at Filter By Source.
- Pick a resource type, and double-click a link type.
- Select the link mapping you want to update and then select
 .
. - Make the necessary updates.
- Select to save the changes.
Deleting a link type mapping
Before you start
You must have Integration Setup selected in the Admin tab of your General Access Security Role.
- Select and then Admin. From the submenu, select Integration . The Integration Platform Settings window is displayed . Select Menu and then Admin.
- From the submenu, select Integration.
- The Integration Platform Settings window is displayed. Select the Links option from the explorer pane .
- In the Integration Links window, select a source at Filter By Source.
- Pick a resource type, and double-click a link type.
- Select the link mapping you want to update and then select
 . Confirm the deletion.
Changing the priority of link type mappings
Link type mappings are evaluated in the order in which they are defined in this window (starting with the link type mapping defined at the top of the list).
Before you start
You must have Integration Setup selected in the Admin tab of your General Access Security Role.
- Select and then Admin. From the submenu, select Integration . The Integration Platform Settings window is displayed . Select Menu and then Admin.
- From the submenu, select Integration.
- The Integration Platform Settings window is displayed. Select the Links option from the explorer pane .
- In the Integration Links window, select a source at Filter By Source.
- Pick a resource type, and double-click a link type.
- Select the link mapping you want to reorder, and then use the
 and
and  buttons to reposition it in the list.
 - Repeat for other link mappings until they are displayed in the priority order you want.
Specifying Link Type Mapping Details
When you create or update a mapping, the Mapping for Link Type [Name of the link type] window is displayed. This window enables you to configure the mapping for the selected link type used to link resources.
- Complete the details as follows:
- Select the Resources tab to specify the resource types linked through the selected link type. You can either use the default higher and lower (peer and peer, etc.) resource types defined for this link type, or select your own.
- Select the Fields tab to map the link type attributes with CMDB link type details in vFire Core. then select Add. In the Add Fields window, select the property or properties you wish to map and then select OK.
- You can select multiple link type properties, including: the impact relationship (Impacts Upper, Impacts Lower), overriding the impact (Impact Overridden), and link status.
- Click in the Link Field column and use the
 button to select an option. These options are specific to the field type selected in the Internal Field column.
 - To set the conditions for updating the field, select one of the options in the Update column.
- Select to save the changes.
| Source | The application or directory server whose link types you want to configure the mapping for. This is a read-only field, displaying the source selected on the previous window. |
| Link Type | The l category of the link you are mapping. This is a read-only field, displaying the link type selected on the previous window. |
| Mapping | Type a name for the mapping. This name will appear in the Mappings table on the Link Type window. |
| Import as Link Type | Select a CMDB link type from the drop-down list. This link type will be used to link the external resources when they are imported into the vFire Core CMDB. |
| Default | Select or clear the checkbox for each item in the link: You can configure this setting for both the parent and child resource types, allowing you to use both or either the default parent and child resource types mapped to this link type. Select to use the default parent and child (peer and peer, etc.) resource types. If both Default checkboxes are selected, the link type will always be recreated in the vFire Core CMDB. Deselect to map other parent or child resource types. Then click Add and in the Select Resource Mapping window, select the resource type mapping(s) you wish to add. |
Select (Value) to specify a value for the property or select a value from a defined list.
Link Status: If you add the Link Status field and select (Value) from the field selector, the next tier in the field select list displays all the link statuses defined by the system administrator in the CMDB Link Status window. Select the status you wish to use by double-clicking its name.
Impacts Upper: If you add the Impacts Upper field and select (Value) from the field selector, the next tier displays True and False, since this is a Boolean field type (checkbox).